Rate website

 Rate website
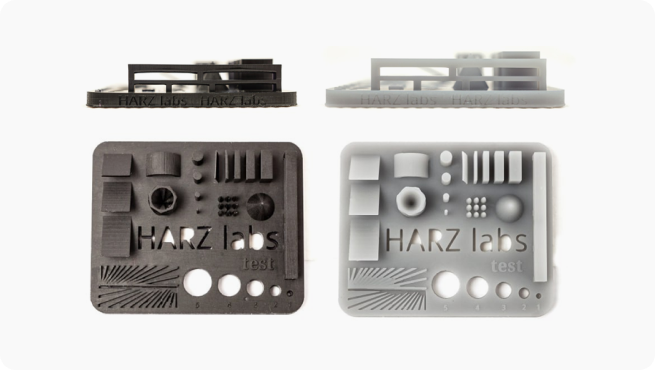
How to Use the HARZ Labs Calibration Test to Adjust Your Print Settings
Modern LCD and DLP printers provide high accuracy and speed of printing, however, for optimal results, it is important to correctly configure printing parameters, such as exposure time and shutdown delay. To make this process easier, we developed a special HARZ Labs calibration test.
Step 1: Download the HARZ Labs test
The test`s STL is available for download on our website in the printer settings section. You can also download it here

Step 2: Printer preparation
It is important to set the initial settings on your printer before printing the test. To simplify this process, we publish recommended initial parameters on our website. You can use them as initial settings.
Print settings
After the settings are set, place the test on the platform. It is recommended to print the test without supports and directly from the platform. This will help save printing time and material, as well as provide an opportunity to objectively assess the settings.
Step 3: Adhesion check
The first thing to pay attention to is whether the test model remains on the build platform. If the model does not stick to the table and remains on the film, the printer should be calibrated in full accordance with the manufacturer's instructions. If the second model also does not stick, increase the exposure time of the base layers. This will provide better adhesion to the table and printing will be successful. In some cases, platform machining (sandblasting or sandpaper) may be required.
Step 4: Print quality check
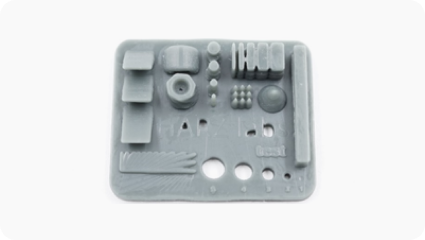
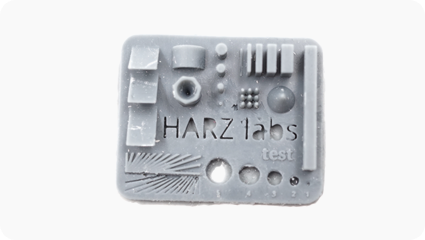
After the test is printed, it should be thoroughly washed and the following geometric elements should inspect.
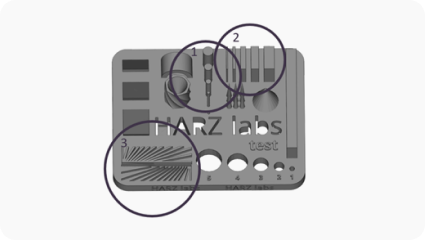
Vertical columns (number 1) and vertical walls (number 2)
You should pay attention to the vertical columns (number 1) and vertical walls (number 2). They must be present on the dough and stand vertically, without slanting. If the small elements on the dough are not printed or the vertical walls start to bend, it is necessary to increase the exposure time. And if the material starts to polymerize between the walls, the exposure time should be decreased.
Divergent lines (number 3)
A useful tool on the test is the divergent lines (number 3). The lines should be well printed and should not merge. In case the lines start to merge, you need to reduce the exposure time, and may also be the result of insufficient pause before starting the exposure.
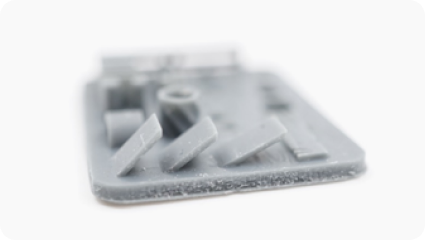
Test with too much exposure time
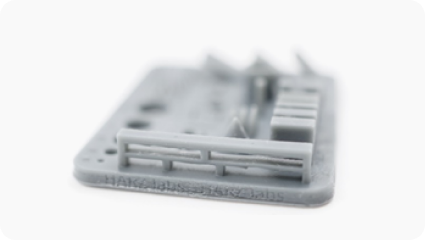
Step 5: Bridge check
You must also pay attention to the horizontal bridge. There should not be any sagging layers on it. Such an effect occurs when the normal layers are insufficiently curing, which can further affect the deformation of the models and their collapse in the printing process subsequently.
Note:
With a smaller layer thickness (for example, 25 microns) or if you use soft or transparent polymers, a small sag or braze is acceptable, in which case it is not worth increasing the illumination time.
Insufficient exposure time
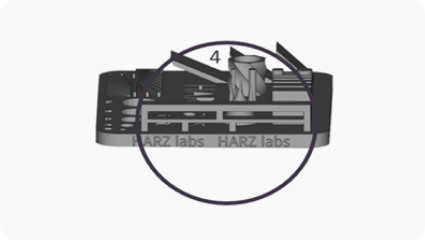
Step 6: Side lettering check
Examine the side lettering on the test model. It should be clearly visible and read. If the text is poorly visible or smeared, this may indicate about the insufficient pause before the exposure starting, and it should be increased.
Small pause before the start of exposure
Step 7: Elephant foot
Sometimes you can see a small halo around the base layers. This phenomenon is normal, since the base layers are exposure more than usual, which leads to parasitic curing in the XY plane. This helps to ensure good grip of the model with the platform. If the "halo" is too large and turns into thin films around the model, reduce the exposure time of the first layers. Note that adhesion to the table will decrease.
Too much base exposure
Important note!
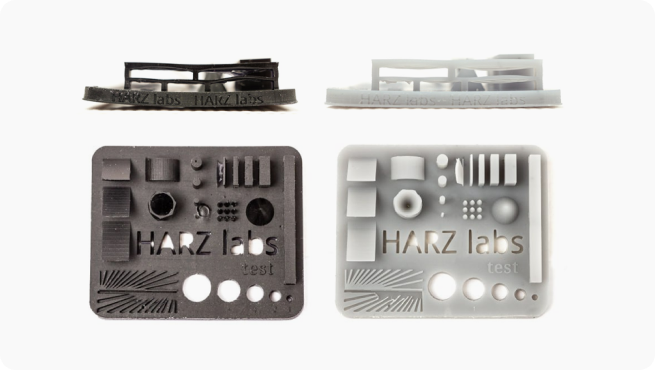
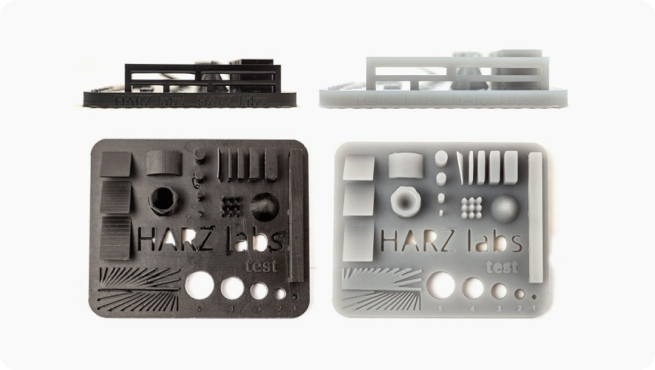
The test results largely depend on the characteristics of the resin and the capabilities of the printers. For example, black resins provide higher detail and are easier to adjust the settings. Even with significant overexposure of the test using black or cherry materials, the detail will remain at an acceptable level.
Light materials, by contrast, are more sensitive to exposure time. If this setting is too high, there may be a significant loss of detail, which will affect print quality. We made several examples of tests from different materials to show the difference.
Insufficient exposure time
Too much exposure time
Optimal exposure time
If you have any questions about using the calibration test when working with HARZ Labs photopolymers, our technical support service will help you with the further adjusting!